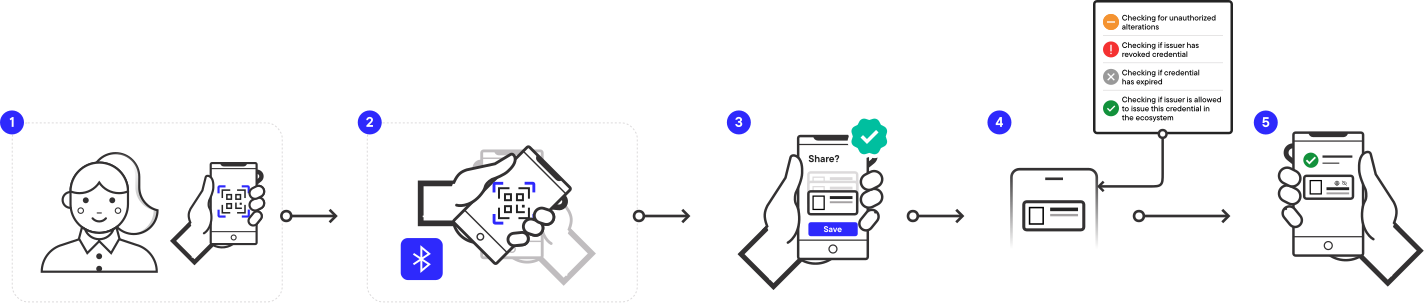
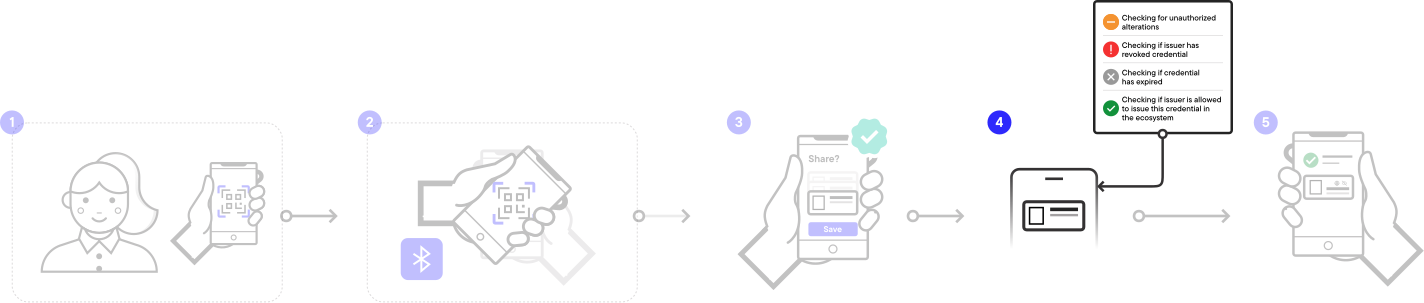
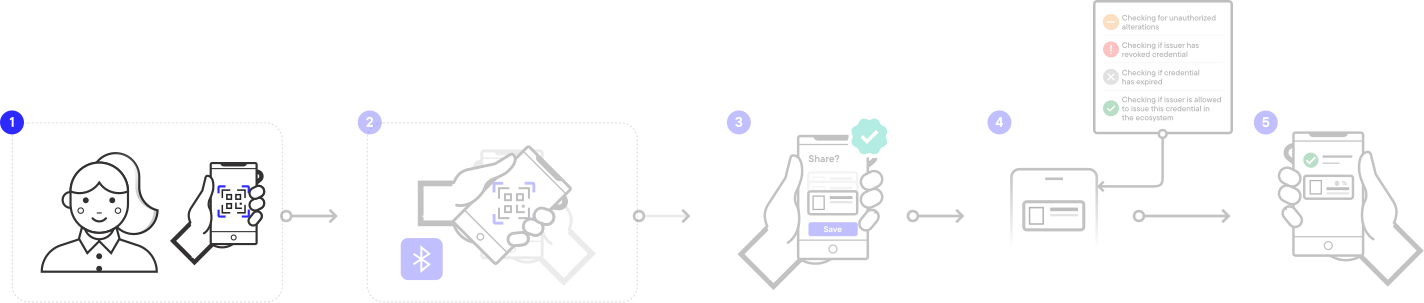
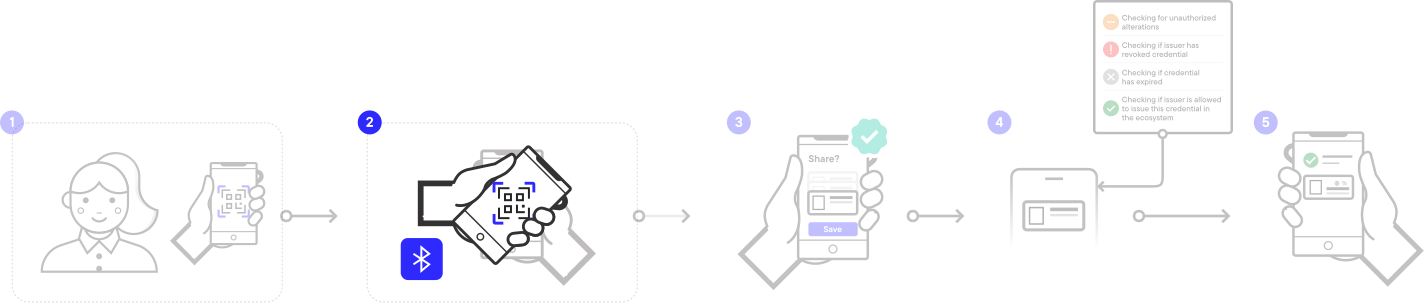
The proximity verification workflow described in this tutorial is based on the
ISO/IEC 18013-5:2021 standard. If you are unfamiliar
with this standard, refer to the following Docs for more information:
We assume you have experience developing applications in the relevant programming languages and
frameworks (Swift for iOS, Kotlin for Android, and JavaScript/TypeScript for React Native).
If you need to get a verifier solution up and running quickly with minimal
development resources and in-house domain expertise, talk to
us about our white-label MATTR GO
Verify which might be a good fit for you.
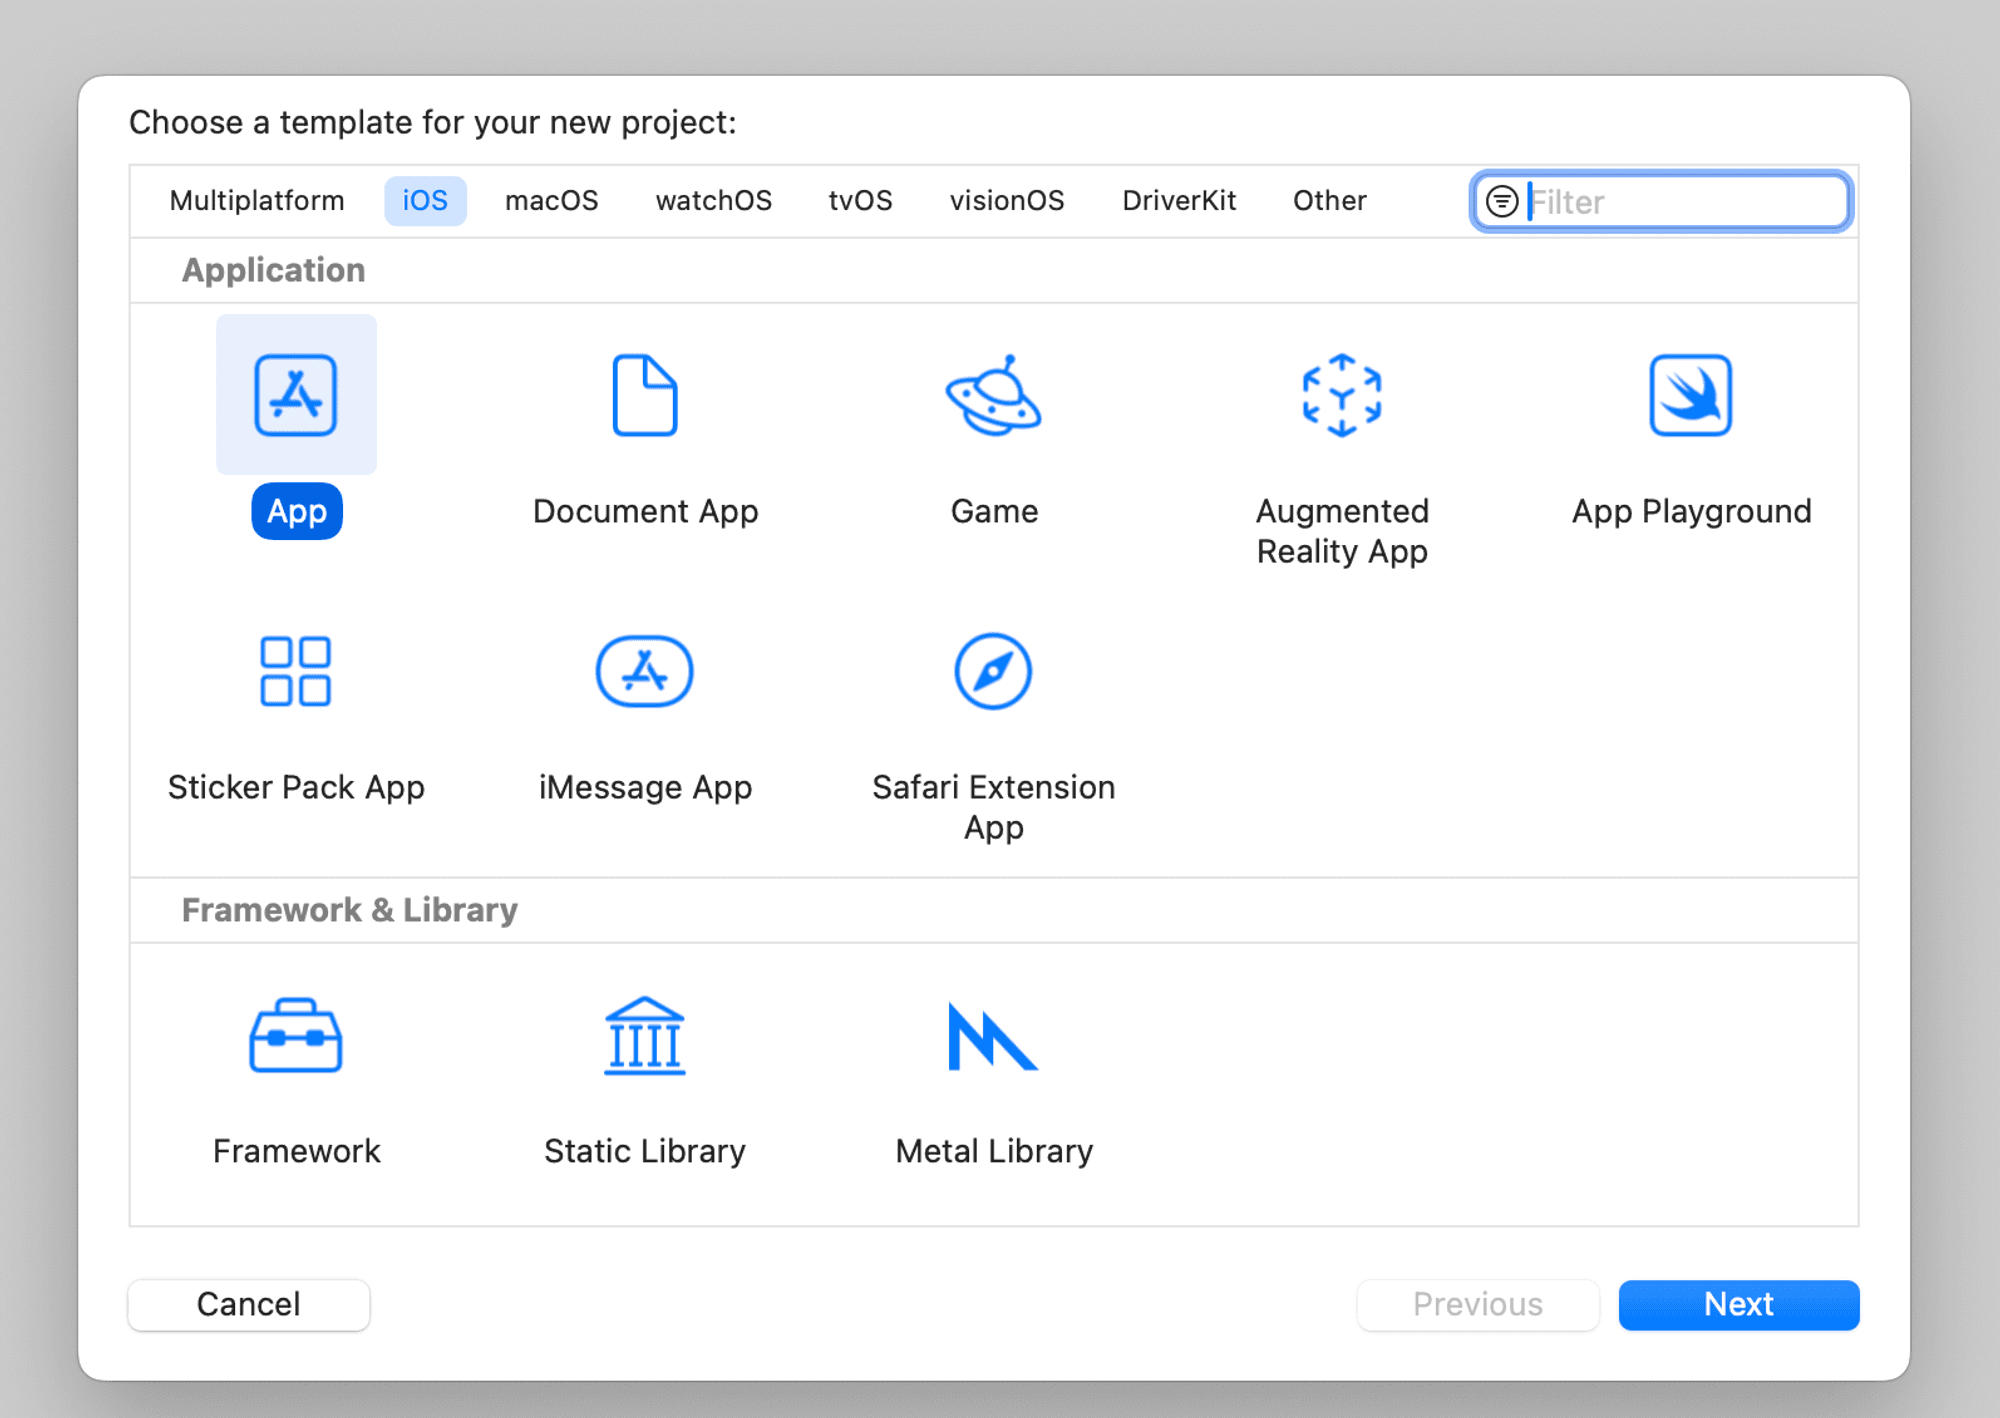
You will need a test credential to verify during this tutorial. You can use the MATTR GO Hold example app to claim a test mDoc by following these steps:
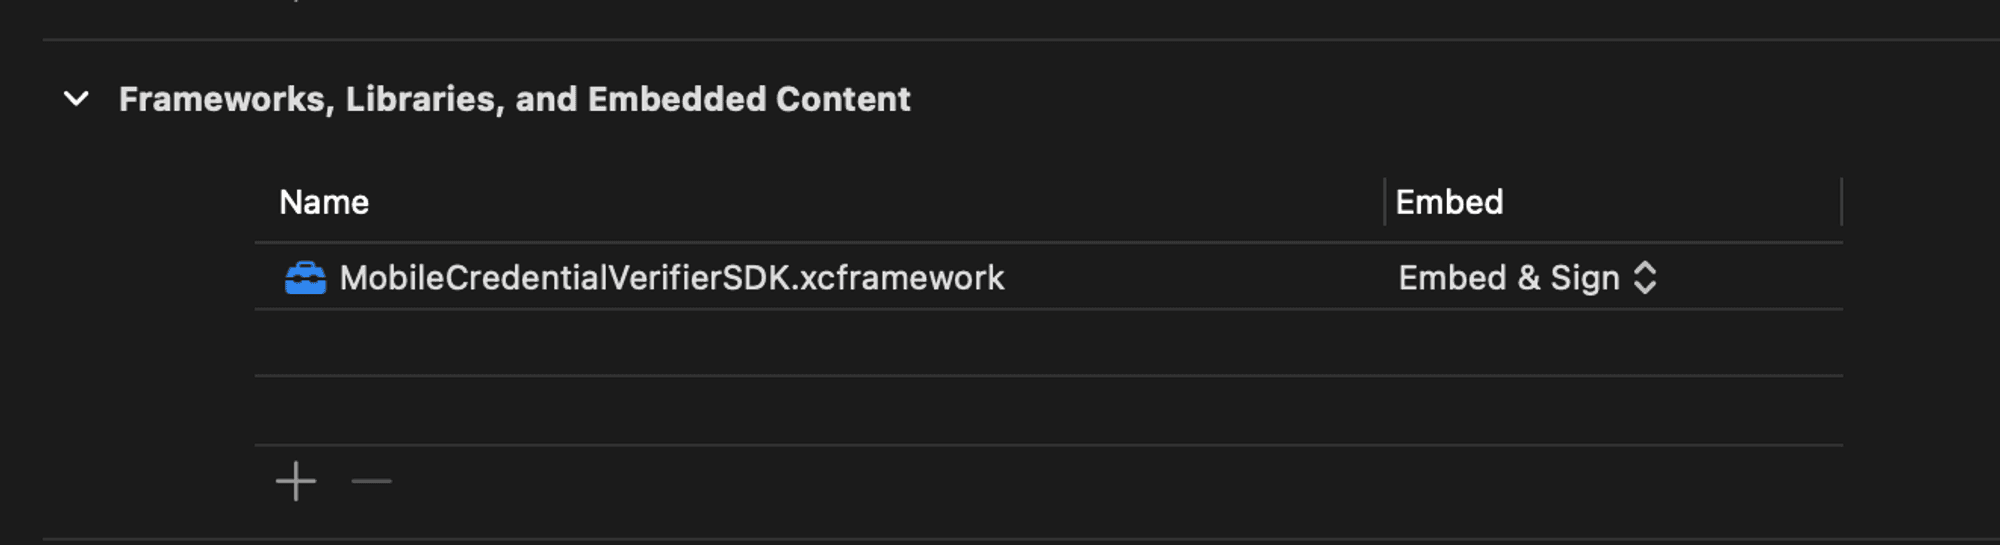
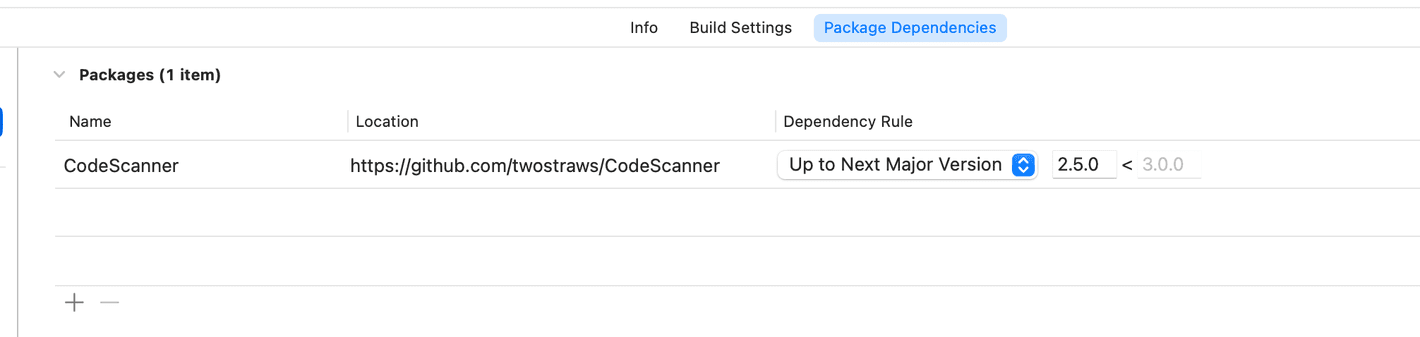
This should result in the the following framework being added to your project:
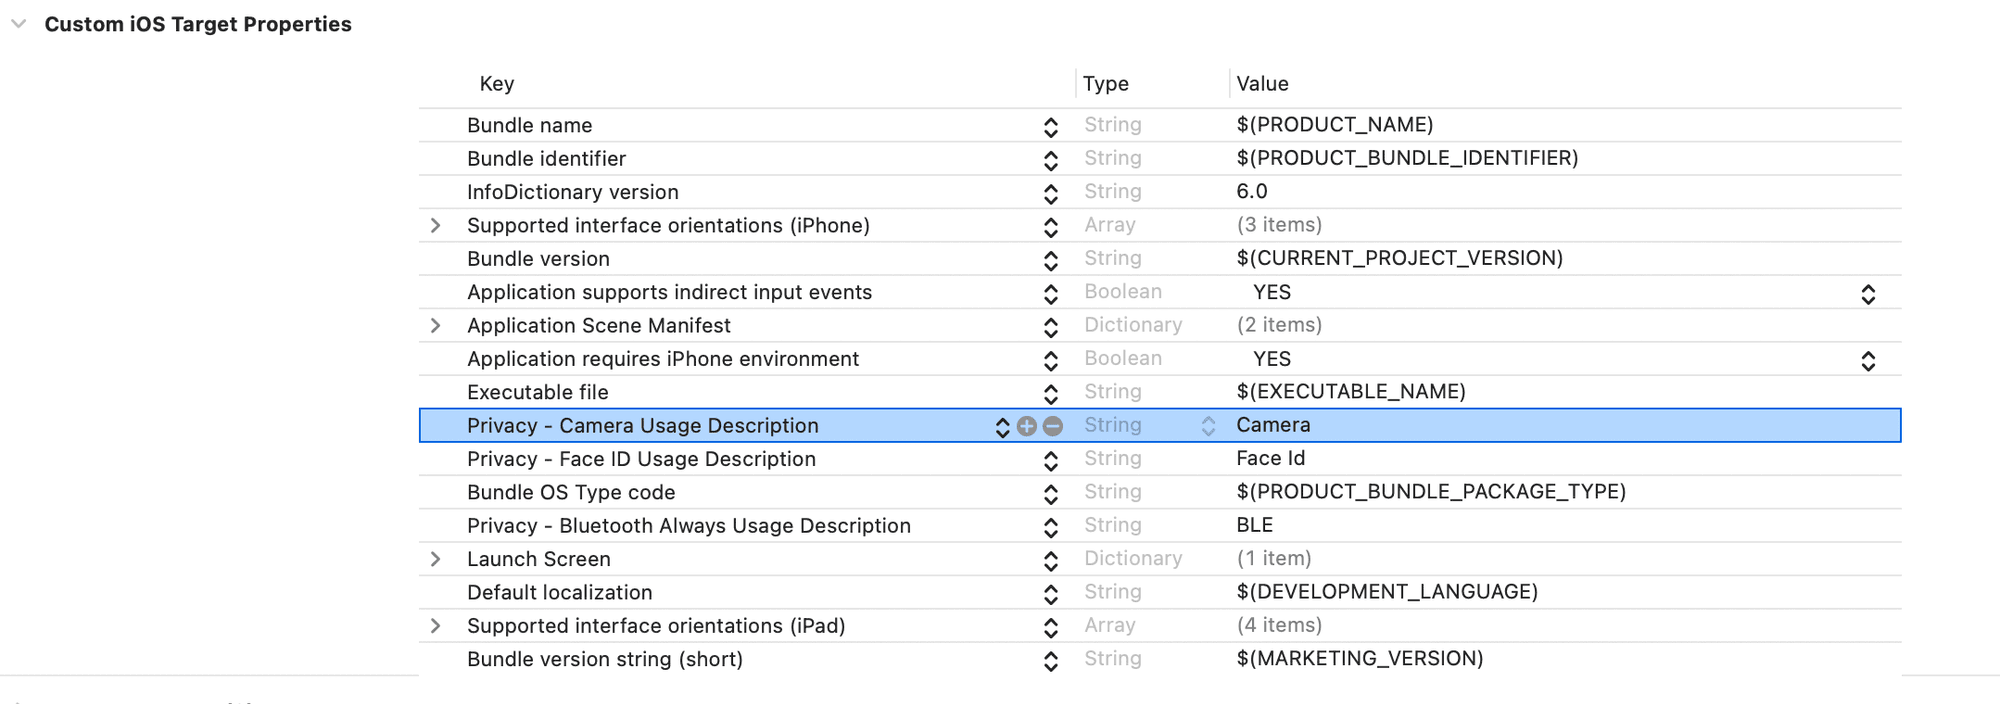
Step 3: Add Bluetooth permissions
The SDK requires access to the mobile device Bluetooth capabilities as part of the proximity
presentation workflow.
Configure these permissions in the Info
tab of the Application target:
Step 4: Run the application
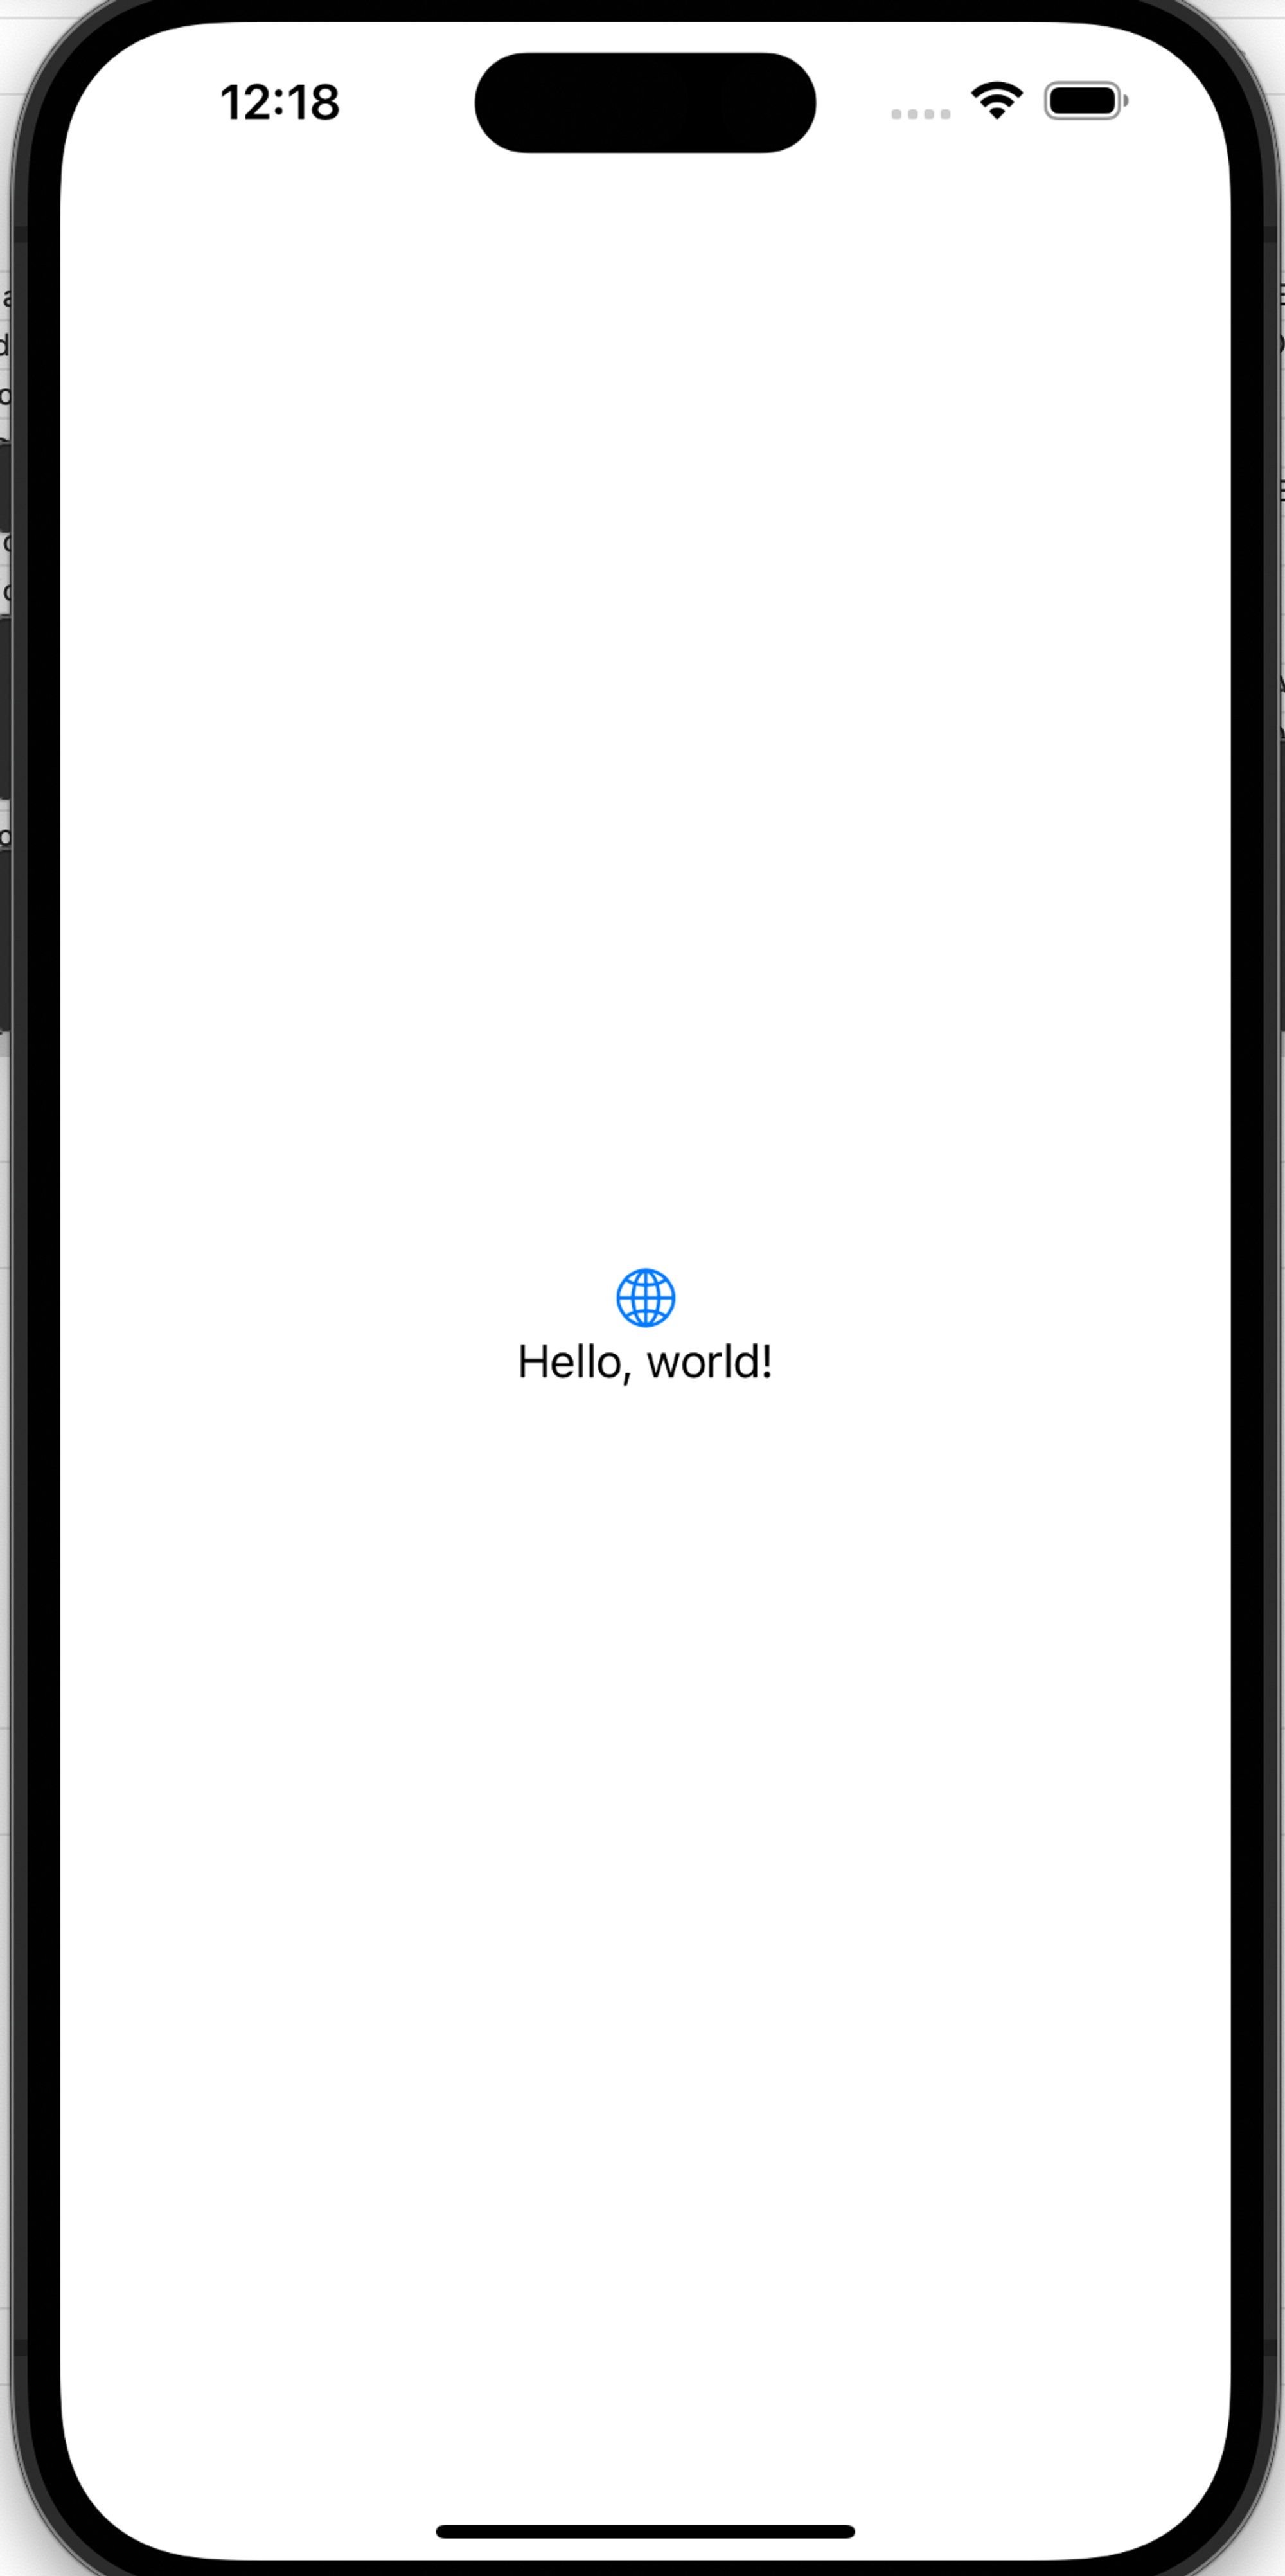
Select Run and make sure the application launches with a “Hello, world!” text in the middle of
the display, as shown in the following image:
Nice work, your application is now all set to begin using the SDK!
The iOS and Android Verifier SDKs must connect to a backend MATTR VII tenant. On initialization, the SDK registers your app instance with the
tenant and obtains a license, so the SDK Backend must be configured before you initialize the SDK. For
a full explanation of the SDK Backend and the capabilities it enables, see SDK Backend.
To configure the SDK Backend, create a Verifier Application on your MATTR VII tenant, either in the
MATTR Portal or via the MATTR VII API:
Log in to the MATTR Portal and expand the Credential
verification section in the left-hand navigation panel.
Select Applications, then select the Create new button.
Use the Name text box to insert a meaningful and friendly name for your application.
Use the Type radio button to select iOS.
Use the Team ID text box to insert your Apple Developer Team ID.
Use the Bundle ID text box to insert the Bundle ID of your app (must match your Xcode project
configuration).
Use the App Attest toggle to set whether App Attest is Active or Inactive. When
active, the app instance must provide a valid App Attest attestation during registration and
token renewal. When inactive, the app can register and renew tokens using an authentication
assertion only.
When App Attest is active, use the App Attest environment toggle to select Development or
Production.
Use the Max time offline field to set the maximum time the SDK can operate offline before
requiring a new license token from the configured MATTR VII backend (minimum 1 day, maximum 30
days, default 7 days).
Select the Create button to create the application and display its detail screen.
Copy and record the ID value. You must use it when initializing the SDK so that it can correctly
identify and authenticate your application.
The first capability you will build into your app is to initialize the SDK so that your app can use
SDK functions and classes. To achieve this, we need to import the MobileCredentialVerifierSDK
framework and then initialize the MobileCredentialVerifier class.
Open the ContentView file in your new project and replace any existing code with the
following:
ContentView
import SwiftUI// Initialize SDK - Step 2.1: Import MobileCredentialVerifierSDKstruct ContentView: View { @State var viewModel: VerifierViewModel = VerifierViewModel() var body: some View { NavigationStack(path: $viewModel.navigationPath) { VStack { Button("Scan QR Code") { viewModel.navigationPath.append(NavigationState.scanQRCode) } .padding() Button("View Response") { viewModel.navigationPath.append(NavigationState.viewResponse) } .padding() } .navigationDestination(for: NavigationState.self) { destination in switch destination { case .scanQRCode: codeScannerView case .viewResponse: presentationResponseView } } } .task { await viewModel.setupCertificates() } } // MARK: Verification Views var codeScannerView: some View { // Verify mDocs - Step 2.4: Create QRScannerView EmptyView() } var presentationResponseView: some View { // Verify mDocs - Step 4.2: Create PresentationResponseView EmptyView() }}// MARK: VerifierViewModel@Observablefinal class VerifierViewModel { var navigationPath = NavigationPath() // Initialize SDK - Step 2.2: Add MobileCredentialVerifier var // Verify mDocs - Step 1.1: Create MobileCredentialRequest instance // Verify mDocs - Step 1.2: Create receivedDocuments variable // Initialize SDK - Step 2.3: Initialize the SDK func setupCertificates() async { // Setup certificates - Step 2: Add trusted issuer certificates print("This method will add the trust anchor to the sdk storage") }}// MARK: Proximity Presentationextension VerifierViewModel { func setupProximityPresentationSession(_ deviceEngagementString: String) { // Verify mDocs - Step 3.2: Create setupProximityPresentationSession print("This method will use qr code string do setup proximity session") } func sendDeviceRequest() { // Verify mDocs - Step 3.3: Create sendDeviceRequest function print("This method will send preconfigured device request to holder app") }}// Verify mDocs - Step 3.1: Extend VerifierViewModel class// MARK: - Navigationenum NavigationState: Hashable { case scanQRCode case viewResponse}
This will serve as the basic structure for your application. We will copy and paste
different code snippets into specific locations to achieve the different functionalities.
These locations are indicated by comments that reference both the section and the step.
We recommend copying and pasting the comment text in Xcode search field (e.g.
// Initialize SDK - Step 2.2: Add MobileCredentialVerifier var) to easily locate it in the code.
Add the following code after the
// Initialize SDK - Step 2.1: Import MobileCredentialVerifierSDK comment to import
MobileCredentialVerifierSDK and gain access to the SDK's capabilities:
ContentView
import MobileCredentialVerifierSDK
Add the following code after the
// Initialize SDK - Step 2.2: Add MobileCredentialVerifier var comment to create a variable
that holds the mobileCredentialVerifier instance:
ContentView
    var mobileCredentialVerifier: MobileCredentialVerifier
    // Holds the asynchronous initialization work so other calls can await it
    // before using the SDK (see Step 2.3).
    private var initializationTask: Task<Void, Error>?
Add the following code after the // Initialize SDK - Step 2.3: Initialize the SDK comment to
assign a shared instance of the class to our mobileCredentialVerifier variable and initialize
the SDK:
ContentView
    init() {
        mobileCredentialVerifier = MobileCredentialVerifier.shared
        // Keep a handle to the initialization Task so later SDK calls can await it.
        initializationTask = Task {
            do {
                let platformConfiguration = PlatformConfiguration(
                    tenantHost: Constants.tenantHost,
                    applicationId: Constants.applicationId
                )
                try await mobileCredentialVerifier.initialize(platformConfiguration: platformConfiguration)
            } catch let error as MobileCredentialVerifierError {
                // Print the underlying reason so registration failures are visible.
                // failedToRegister carries the cause (for example an App Attest
                // App ID / team mismatch); invalidLicense means no valid license.
                print("SDK initialization failed:", error)
                throw error
            }
        }
    }
The SDK Backend requires a platformConfiguration, so initialize now takes one and is
asynchronous (called here from a Task). platformConfiguration contains the following properties, which we will add as constants in the next step:
tenantHost: The URL of your MATTR VII tenant where your Verifier Application is configured.
applicationId: The id returned when you
created the Verifier Application. Network access is required the
first time the SDK initializes (for registration) and when the license is later renewed.
Create a new file named Constants.swift and add the following, replacing the placeholders with
your own values:
Constants.swift
import Foundationenum Constants { static let tenantHost = URL(string: "https://your-tenant.vii.mattr.global")! static let applicationId = "<YOUR_VERIFIER_APPLICATION_ID>"}
tenantHost: The URL of your MATTR VII tenant, available in the MATTR Portal under Platform Management > Tenant.
Once the app launches you will see a screen with three buttons, each leading to an empty view. In
the following steps, you will implement proximity presentation functionalities into these views.
Once the SDK is initialized, the next step is to add a trusted issuer certificate.
Every mDoc is signed using a certificate chain, also known as a chain of trust. To verify a presented mDoc, your application must confirm that this chain leads back to a trusted root certificate, called an IACA.
To do this, your application must provide the SDK with the IACA certificates for every issuer it should trust. In this tutorial, you will add the IACA certificate for the MATTR Labs test issuer, which was used to issue the credential you will verify.
Create a new file called IACAs.swift and add the following code:
This file contains the root certificate of the MATTR Labs test issuer.
Return to the ContentView.swift file and replace the print statement under the comment // Setup certificates - Step 2: Add trusted issuer certificates with the following:
ContentView.swift
   do {
       // Wait for initialization to finish before using the SDK. This returns
       // immediately once initialize has completed, and rethrows if it failed.
       try await initializationTask?.value
       _ = try await mobileCredentialVerifier.addTrustedIssuerCertificates(certificates: [IACAs.mattrLabs])
   } catch {
       print("Failed to add trusted issuer certificate:", error)
   }
This function will be called as soon as the app view appears and the certificate will be added to the app.
In this part we will build the components that enable a verifier app to verify an mDoc presented via
a proximity workflow as per ISO/IEC 18013-5:2021:
To achieve this, your application must be able to:
Create a presentation request that defines the information required for verification.
Scan and process a QR code presented by a wallet application. Your application must retrieve the information from that QR code and use it to establish a secure connection between the verifier and holder devices.
Your verifier application then uses this secure connection to send a presentation request to which the holder wallet application responds with a presentation response.
Finally, the SDK verifies any mDocs included in the response, stores the verification results in a variable and makes them available to your application to display.
Your application will use the SDK's createProximityPresentationSession function
that takes a string retrieved from the QR code and uses it to establish a proximity presentation
session with the wallet application and initiate the presentation workflow.
This function takes a listener argument of type ProximityPresentationSessionListener delegate,
which will receive proximity presentation session events.
Step 1: Create a presentation request
As a verifier, you can select what information you request for verification. Your application
implements this by creating a
MobileCredentialRequest
instance to define the required information, and a new variable to hold the response from the wallet
application.
Open the ContentView file and add the following code under the
// Verify mDocs - Step 1.1: Create MobileCredentialRequest instance comment to define what
information to request from the wallet application user:
The requested credential type (e.g. org.iso.18013.5.1.mDL).
The claims required for verification (e.g. family_name).
The requested namespace (e.g. org.iso.18013.5.1).
Whether or not the verifier intends to persist the claim value (true/false).
For the verification to be successful, the presented credential must include the referenced
claim against the specific namespace defined in the request. Our example requests the
birth_date under the org.iso.18013.5.1 namespace. If a wallet responds to this request with
a credential that includes a birth_date but rather under the org.iso.18013.5.1.US namespace,
the claim will not be verified.
To simplify the tutorial, this is a hardcoded request. However, once you are
comfortable with the basic functionalities you can create a UI in your
verifier application that enables the user to create different requests on the
fly by selecting different claims to include. Check out our GO Verify
app to see this in action.
Add the following code under the Verify mDocs - Step 1.2: Create receivedDocuments variable
comment to create a new receivedDocuments variable that will hold the response from the wallet
application:
ContentView
var receivedDocuments: [MobileCredentialPresentation] = []
Your application now has an existing credential request to share, and a variable to hold any
incoming responses. In the next step we will build the capabilities to send this request and handle
the response.
Step 2: Scan and process a QR code
As defined in ISO/IEC 18130-5:2021, a
proximity presentation workflow is always initiated by the
holder (wallet application user), who must create a QR code for the verifier to scan in order to
initiate the device engagement phase.
This means that your verifier application must be able to scan and process this QR code. For ease of
implementation, we will use a third party framework to achieve this.
Create a new swift file named
QRScannerView and add the following code into it to implement the QR scanning capability:
QRScannerView
import SwiftUIimport CodeScannerimport AVFoundationstruct QRScannerView: View { private let completionHandler: (String) -> Void init(completion: @escaping (String) -> Void) { completionHandler = completion } var body: some View { CodeScannerView(codeTypes: [.qr]) { result in switch result { case .failure(let error): print(error.localizedDescription) case .success(let result): print(result.string) completionHandler(result.string) } } }}
Back in the ContentView file, replace the EmptyView() under the
// Verify mDocs - Step 2.4: Create QRScannerView comment with the following code to create a
new app view that the user will use to scan a QR code:
ContentView
    QRScannerView(
        completion: { string in
            viewModel.setupProximityPresentationSession(string)
        }
    )
Run
the app and select the Scan QR Code button. You should be navigated to the new
QRScannerView where you can use the camera to scan a QR code.
Next we will build the logic that handles this QR code to establish a secure connection with the
wallet application.
Step 3: Exchange presentation request and response
Add the following code under the Verify mDocs - Step 3.1: Extend VerifierViewModel class to
extend the VerifierViewModel class with the
ProximityPresentationSessionListener
protocol:
ContentView
extension VerifierViewModel: ProximityPresentationSessionListener {

            public func onEstablished() {
                sendDeviceRequest()
            }

            // Session-creation failures (Bluetooth permission, transport setup,
            // unsupported curve, and so on) are delivered here, not to onTerminated.
            // onError has an empty default implementation, so without this method
            // those failures would be silent.
            public func onError(error: (any Error)?) {
                print("Proximity session error:", error?.localizedDescription ?? "unknown")
            }

            public func onTerminated(error: (any Error)?) {
                print("Session terminated:", error?.localizedDescription ?? "none")
            }
        }
Now, as soon as a connection is established, the app will send a device request. You will
implement the functionality of sendDeviceRequest() in VerifierViewModel later in the
tutorial. If a session cannot be created, onError reports the reason.
Replace the print statement under the
// Verify mDocs - Step 3.2: Create setupProximityPresentationSession comment with the
following code to call the SDK's
createProximityPresentationSession
function, passing a device engagement string (retrieved from a QR code) and self as a listener
to create a proximity presentation session:
Replace the print statement under the
// Verify mDocs - Step 3.3: Create sendDeviceRequest function comment with following code to
implement the logic to send a device request:
ContentView
    Task { @MainActor in
        receivedDocuments = []
        do {
            // Navigate to response screen
            navigationPath.append(NavigationState.viewResponse)
            // Request mDocs
            let deviceResponse = try await mobileCredentialVerifier.sendProximityPresentationRequest(
                request: [mobileCredentialRequest]
            )

            // Assign new values from the response
            receivedDocuments = deviceResponse.credentials
            // Terminate session after response is received (optional)
            await mobileCredentialVerifier.terminateProximityPresentationSession()
        } catch {
            print(error)
            receivedDocuments = []
        }
    }
Store the wallet response in the deviceResponse variable. This includes the verification
results of any credentials included in the response.
Store the verification results in the receivedDocuments variable.
Terminate the presentation session once the response is received.
Step 4: Display verification results
Create a new file named DocumentView and add the following code to display available
verification results:
DocumentView
import MobileCredentialVerifierSDKimport SwiftUI struct DocumentView: View { var viewModel: DocumentViewModel var body: some View { VStack(alignment: .leading, spacing: 10) { Text(viewModel.docType) .font(.title) .fontWeight(.bold) .padding(.bottom, 5) Text(viewModel.verificationResult) .font(.title) .fontWeight(.bold) .foregroundStyle(viewModel.verificationFailedReason == nil ? .green : .red) .padding(.bottom, 5) if let verificationFailedReason = viewModel.verificationFailedReason { Text(verificationFailedReason) .font(.title3) .fontWeight(.bold) .foregroundStyle(.red) .padding(.bottom, 5) } ForEach(viewModel.namespacesAndClaims.keys.sorted(), id: \.self) { key in VStack(alignment: .leading, spacing: 5) { Text(key) .font(.headline) .padding(.vertical, 5) .padding(.horizontal, 10) .background(Color.gray.opacity(0.2)) .cornerRadius(5) ForEach(viewModel.namespacesAndClaims[key]!.keys.sorted(), id: \.self) { claim in HStack { Text(claim) .fontWeight(.semibold) Spacer() Text(viewModel.namespacesAndClaims[key]![claim]! ?? "") .fontWeight(.regular) } .padding(.vertical, 5) .padding(.horizontal, 10) .background(Color.white) .cornerRadius(5) .shadow(radius: 1) } } .padding(.vertical, 5) } if !viewModel.claimErrors.isEmpty { Text("Failed Claims:") .font(.headline) .padding(.vertical, 5) ForEach(viewModel.claimErrors.keys.sorted(), id: \.self) { key in VStack(alignment: .leading, spacing: 5) { Text(key) .font(.headline) .padding(.vertical, 5) .padding(.horizontal, 10) .background(Color.gray.opacity(0.2)) .cornerRadius(5) ForEach(viewModel.claimErrors[key]!.keys.sorted(), id: \.self) { claim in HStack { Text(claim) .fontWeight(.semibold) Spacer() Text(viewModel.claimErrors[key]![claim]! ?? "") .fontWeight(.regular) } .padding(.vertical, 5) .padding(.horizontal, 10) .background(Color.white) .cornerRadius(5) .shadow(radius: 1) } } .padding(.vertical, 5) } } } .padding() .background(RoundedRectangle(cornerRadius: 10).fill(Color.white).shadow(radius: 5)) .padding(.horizontal) } } // MARK: DocumentViewModel @Observable class DocumentViewModel { let docType: String let namespacesAndClaims: [String: [String: String?]] let claimErrors: [String: [String: String?]] let verificationResult: String let verificationFailedReason: String? init(from presentation: MobileCredentialPresentation) { self.docType = presentation.docType self.verificationResult = presentation.verificationResult.verified ? "Verified" : "Invalid" self.verificationFailedReason = presentation.verificationResult.failureType?.rawValue self.namespacesAndClaims = presentation.claims?.reduce(into: [String: [String: String]]()) { result, outerElement in let (outerKey, innerDict) = outerElement result[outerKey] = innerDict.mapValues { $0.textRepresentation } } ?? [:] self.claimErrors = presentation.claimErrors?.reduce(into: [String: [String: String]]()) { result, outerElement in let (outerKey, innerDict) = outerElement result[outerKey] = innerDict.mapValues { "\($0)" } } ?? [:] } } // MARK: Helper extension MobileCredentialElementValue { var textRepresentation: String { switch self { case .bool(let bool): return "\(bool)" case .string(let string): return string case .int(let int): return "\(int)" case .unsigned(let uInt): return "\(uInt)" case .float(let float): return "\(float)" case .double(let double): return "\(double)" case let .date(date): let dateFormatter = DateFormatter() dateFormatter.dateStyle = .short dateFormatter.timeStyle = .none return dateFormatter.string(from: date) case let .dateTime(date): let dateFormatter = DateFormatter() dateFormatter.dateStyle = .short dateFormatter.timeStyle = .short return dateFormatter.string(from: date) case .data(let data): return "Data \(data.count) bytes" case .map(let dictionary): let result = dictionary.mapValues { value in value.textRepresentation } return "\(result)" case .array(let array): return array.reduce("") { partialResult, element in partialResult + element.textRepresentation } .appending("") @unknown default: return "Unknown type" } } }
The DocumentView file comprises the following elements:
DocumentView : Basic UI layout for viewing received documents and verification results.
DocumentViewModel : This class takes MobileCredentialPresentation and converts its
elements into strings to display in the DocumentView.
Extension of MobileCredentialElementValue which converts the values of received claims into
a human-readable format.
Return to the ContentView file and replace the EmptyView() under the
// Verify mDocs - Step 4.2: Create PresentationResponseView comment with the following code to
display the DocumentView view when verification results are available:
You can implement
NFC based device engagement
capabilities (currently supported by the Android Verifier SDK and the React Native SDK for Android platforms only).