
Learn how to build an application that can verify an mDoc from another app on the same device
Overview
In this tutorial you will use the mDocs Mobile Verifier SDKs to build an application that can verify an mDoc presented from a different application on the same device via OID4VP, as defined in ISO 18013-7 Annex B.

- A relying party uses the Mobile Verifier SDK to embed a remote verification workflow into a mobile application.
- When a user interacts with the mobile application, a matching wallet application installed on their mobile device is invoked to request an mDoc for verification.
- The user consents to sharing the requested information.
- The user's wallet application shares the matching mDoc with the MATTR VII tenant configured by the Mobile Verifier SDK to perform the verification workflow.
- The MATTR VII tenant performs the required checks and returns the verification results via the Mobile Verifier SDK to the verifier application.
- The user journey continues based on the verification results.
The result will look something like this:
To achieve this, you will build the following capabilities into your verifier application:
- Initialize the SDK, so that your application can use its functions and classes.
- Request an mDoc for verification from a compliant wallet application.
- Handle the redirect from the wallet application.
- Display the verification results.
Prerequisites
Before you get started, let's make sure you have everything you need.
Prior knowledge
-
The remote verification workflow described in this tutorial is based on the OID4VP specification and the ISO 18013-7 standard. If you are unfamiliar with these, refer to the following resources for more information:
- What are mDocs?
- What is remote verification?
- Breakdown of the remote mobile app verification workflow.
-
We assume you have experience developing applications in the relevant programming languages and frameworks (Swift for iOS and Kotlin for Android).
Assets
- Use the Get Started form to request a trial of MATTR verification capabilities. You will receive access to the following resources:
- MATTR Pi mDocs Verifier SDK for your chosen platform (iOS, Android, or React Native).
- MATTR VII tenant.
- As part of your MATTR Pi SDK onboarding process you will be provided with access to the following resources:
- ZIP file which includes the required framework:
(
MobileCredentialVerifierSDK.xcframework.zip). - Sample Verifier app: You can use this app for reference as you work through this tutorial.
- ZIP file which includes the required framework:
(
This tutorial is only meant to be used with the latest version of the iOS mDocs Verifier SDK.
Development environment
- Xcode setup with either:
- Local build settings if you are developing locally.
- iOS developer account if you intend to publish your app.
Testing device
You will need a mobile device to test the workflow with.
Supported iOS device to run the built Verifier application on, setup with:
- Available internet connection
- A wallet application that can present an mDoc remotely as per ISO/IEC 18013-7 and OID4VP. We recommend using the sample holder app you can build with our Holder SDK quickstart guide.
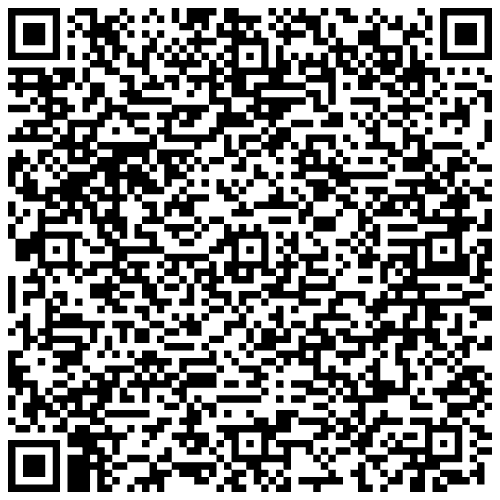
- Use your testing wallet application to claim an mDoc by scanning the following QR code:
Got everything? Let's get going!
Overview
The following diagram depicts the workflow you will build in this tutorial:
- The user triggers the workflow by interacting with the verifier application.
- The verifier application uses the embedded Mobile Verifier SDK capabilities to start a presentation-based verification session with the configured MATTR VII tenant.
- The MATTR VII tenant responds with a link to invoke a matching wallet application.
- The verifier application uses the link to invoke a matching wallet application using a redirect.
- The wallet application makes a request to the MATTR VII tenant to retrieve a request object, defining what information is requested for verification.
- The MATTR VII tenant returns the request object to the wallet application.
- The wallet application (upon user consent) returns an authorization response to the MATTR VII tenant, which includes the information required for verification.
- The MATTR VII tenant returns the verification results to the verifier application.
- The verifier application surfaces the verification results to the user and the interaction continues.
You will build this workflow in two parts:
- Part 1: Setup the MATTR VII Verifier tenant.
- Part 2: Build a mobile application with mDocs verification capabilities.
Part 1: Setup the MATTR VII Verifier tenant
The MATTR VII tenant will be used to interact with your mobile application (generating a verification request) and the wallet application (presenting an mDoc for verification) as per OID4VP and ISO/IEC 18013-7 Annex B. To enable this, you must:
- Create a MATTR VII tenant: This is the tenant that will be used to perform the verification workflow.
- Create a verifier application configuration: Define what applications can create verification sessions with the MATTR VII tenant, and how to handle these requests.
- Create a supported wallet configuration: Define how to invoke specific wallet applications as part of a remote verification workflow.
- Configure a trusted issuer: The MATTR VII verifier tenant will only accept mDocs issued by these trusted issuers.
Create a MATTR VII tenant
If you already have a tenant you can skip this step.
- Log into the MATTR Portal.
- Select the Create/switch tenant button on the top-right side of the screen.
The All tenants panel is displayed, listing any existing tenants. - Select the Create new button.
The New tenant form is displayed. - Use the Region dropdown list to select the region your tenant will be hosted in.
- Use the Tenant subdomain text box to insert a subdomain for your tenant (e.g.
remote-mobile-verification). - Select the Create button to create the new tenant.
- Copy the displayed tenant information (
audience,auth_url,tenant_url,client_idandclient_secret) which is required for the next step.
Create a verifier application configuration
The iOS and Android Verifier SDKs must connect to a backend MATTR VII tenant. On initialization, the SDK registers your app instance with the tenant and obtains a license, so the SDK Backend must be configured before you initialize the SDK. For a full explanation of the SDK Backend and the capabilities it enables, see SDK Backend.
For remote mobile (app-to-app) verification, the Verifier Application also defines the OID4VP redirect URI used to return the user to your app after the wallet presents the credential. For Android applications, you can instead choose DC API. When only DC API is selected, the OID4VP redirect URI is not required and is not shown. DC API is not available for iOS applications.
To configure the SDK Backend and the OID4VP redirect URI, create a Verifier Application on your MATTR VII tenant, either in the MATTR Portal or via the MATTR VII API:
- Log in to the MATTR Portal and expand the Credential verification section in the left-hand navigation panel.
- Select Applications, then select the Create new button.
- Use the Name text box to insert a meaningful and friendly name for your application.
- Use the Type radio button to select iOS.
- Use the Team ID text box to insert your Apple Developer Team ID.
- Use the Bundle ID text box to insert the Bundle ID of your app (must match your Xcode project configuration).
- Use the App Attest toggle to set whether App Attest is Active or Inactive. When active, the app instance must provide a valid App Attest attestation during registration and token renewal. When inactive, the app can register and renew tokens using an authentication assertion only. Refer to attestation vs assertion fall-back for more information.
- When App Attest is active, use the App Attest environment toggle to select Development or Production.
- Use the Allowed presentation method radio button to select Remote and in-person.
- Configure the OID4VP settings for the remote presentation flow by setting the OID4VP redirect URI
the user is returned to after the wallet presents the credential. Structure it using your app's
custom URL scheme (for example,
com.yourname.mobileverifier://oid4vp-callback). - Use the Max time offline field to set the maximum time the SDK can operate offline before requiring a new license token from the configured MATTR VII backend (minimum 1 day, maximum 30 days, default 7 days). Refer to token validity and offline use for more information.
- Select the Create button to create the application and display its detail screen.
- Copy and record the
IDvalue. You must use it when initializing the SDK.
Create a supported wallet configuration
Verifier applications can define specific wallet applications to accept mDocs from as part of their verification workflows. The MATTR VII verifier tenant needs to be configured with a specific URI scheme that will be used to invoke these wallets.
- Log in to the MATTR Portal (if you haven't already).
- In the navigation panel on the left-hand side, expand the Credential Verification menu.
- Click on Supported wallets.
- Click on Create new.
- Enter a meaningful Name for the new supported wallet (e.g. "My Supported Wallet").
- Enter
mdoc-openid4vp://in the Authorization Endpoint field. This is the URI scheme that will be used to invoke the wallet application. More information on applying different URI schemes and the resulting user experience can be found in the workflow page. - Click on Create.
The authorizationEndpoint configured in the example above
(mdoc-openid4vp://) is the default OID4VP scheme. While this is technically
redundant, we chose to include this step to explain how to configure this
endpoint for wallet application using different schemes. More information on applying different URI schemes and the resulting user experience can be found in the workflow page.
Configure a trusted issuer
- In the navigation panel on the left-hand side, expand the Credential Verification menu.
- Click on Trusted issuers.
- Click on Create new.
- Copy and paste the following certificate in the Certificate PEM file field:
-----BEGIN CERTIFICATE-----
MIICYzCCAgmgAwIBAgIKXhjLoCkLWBxREDAKBggqhkjOPQQDAjA4MQswCQYDVQQG
EwJBVTEpMCcGA1UEAwwgbW9udGNsaWZmLWRtdi5tYXR0cmxhYnMuY29tIElBQ0Ew
HhcNMjQwMTE4MjMxNDE4WhcNMzQwMTE1MjMxNDE4WjA4MQswCQYDVQQGEwJBVTEp
MCcGA1UEAwwgbW9udGNsaWZmLWRtdi5tYXR0cmxhYnMuY29tIElBQ0EwWTATBgcq
hkjOPQIBBggqhkjOPQMBBwNCAASBnqobOh8baMW7mpSZaQMawj6wgM5e5nPd6HXp
dB8eUVPlCMKribQ7XiiLU96rib/yQLH2k1CUeZmEjxoEi42xo4H6MIH3MBIGA1Ud
EwEB/wQIMAYBAf8CAQAwDgYDVR0PAQH/BAQDAgEGMB0GA1UdDgQWBBRFZwEOI9yq
232NG+OzNQzFKa/LxDAuBgNVHRIEJzAlhiNodHRwczovL21vbnRjbGlmZi1kbXYu
bWF0dHJsYWJzLmNvbTCBgQYDVR0fBHoweDB2oHSgcoZwaHR0cHM6Ly9tb250Y2xp
ZmYtZG12LnZpaS5hdTAxLm1hdHRyLmdsb2JhbC92Mi9jcmVkZW50aWFscy9tb2Jp
bGUvaWFjYXMvMjk0YmExYmMtOTFhMS00MjJmLThhMTctY2IwODU0NWY0ODYwL2Ny
bDAKBggqhkjOPQQDAgNIADBFAiAlZYQP95lGzVJfCykhcpCzpQ2LWE/AbjTGkcGI
SNsu7gIhAJfP54a2hXz4YiQN4qJERlORjyL1Ru9M0/dtQppohFm6
-----END CERTIFICATE------ Click on Add.
Part 2: Build a mobile application with mDocs verification capabilities
Now that the MATTR VII verifier tenant is properly configured, you can proceed with the steps required to embed verification capabilities into your mobile verifier application:
- Setup your environment: Setup the required infrastructure for your mobile application.
- Initialize the SDK: So that the SDK functions are available in your mobile application.
- Request a credential from wallet application: Build the capability to request an mDoc for verification from a wallet application.
- Display verification results:
Step 1: Environment setup
Step 1: Create a new project
Follow the detailed instructions to Create a new Xcode Project and add your organization's identifier.
Step 2: Unzip the dependencies file
- Unzip the
MobileCredentialVerifierSDK.xcframework.zipfile. - Drag the
MobileCredentialVerifierSDK.xcframeworkfolder into your project. - Configure
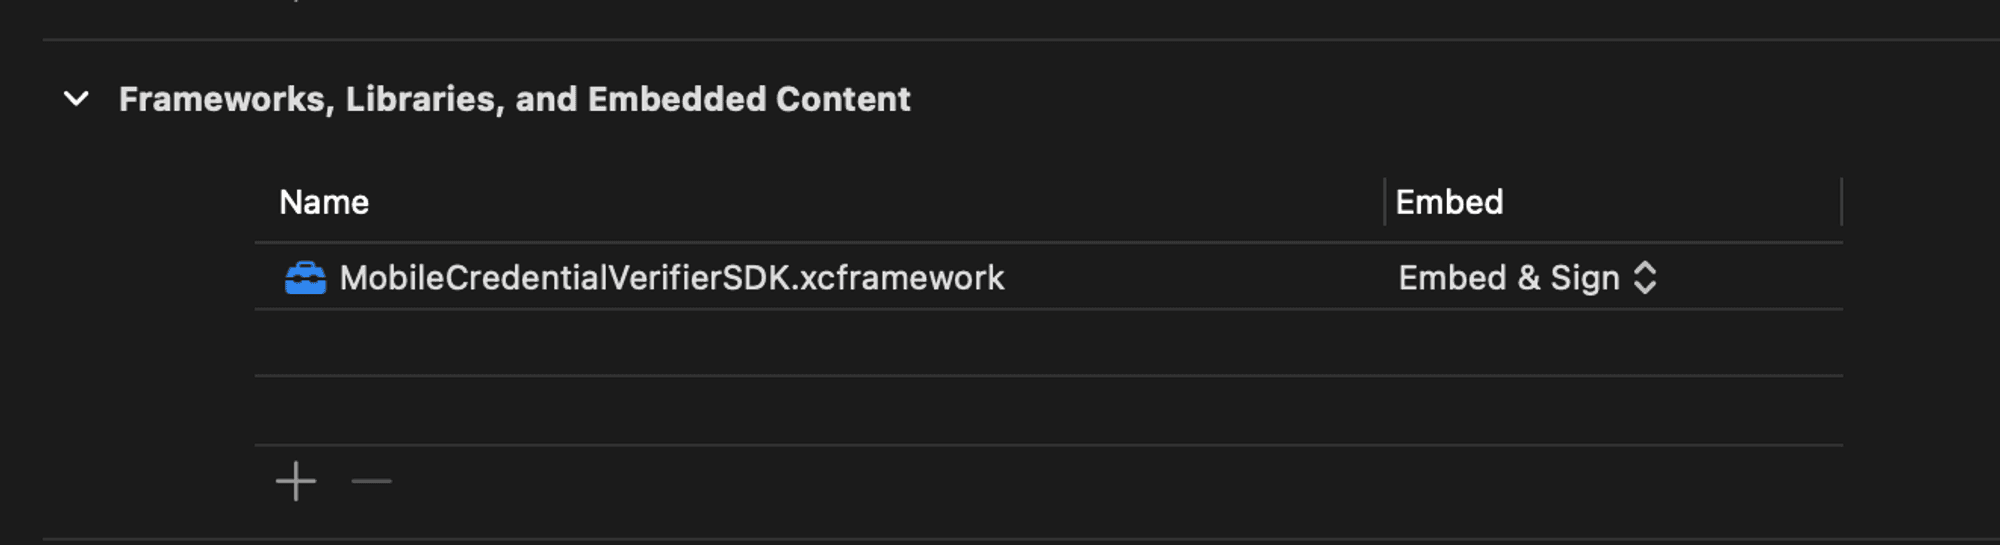
MobileCredentialVerifierSDK.xcframeworkto Embed & sign.
See Add existing files and folders for detailed instructions.
This should result in the the following framework being added to your project:
Step 3: Run the application
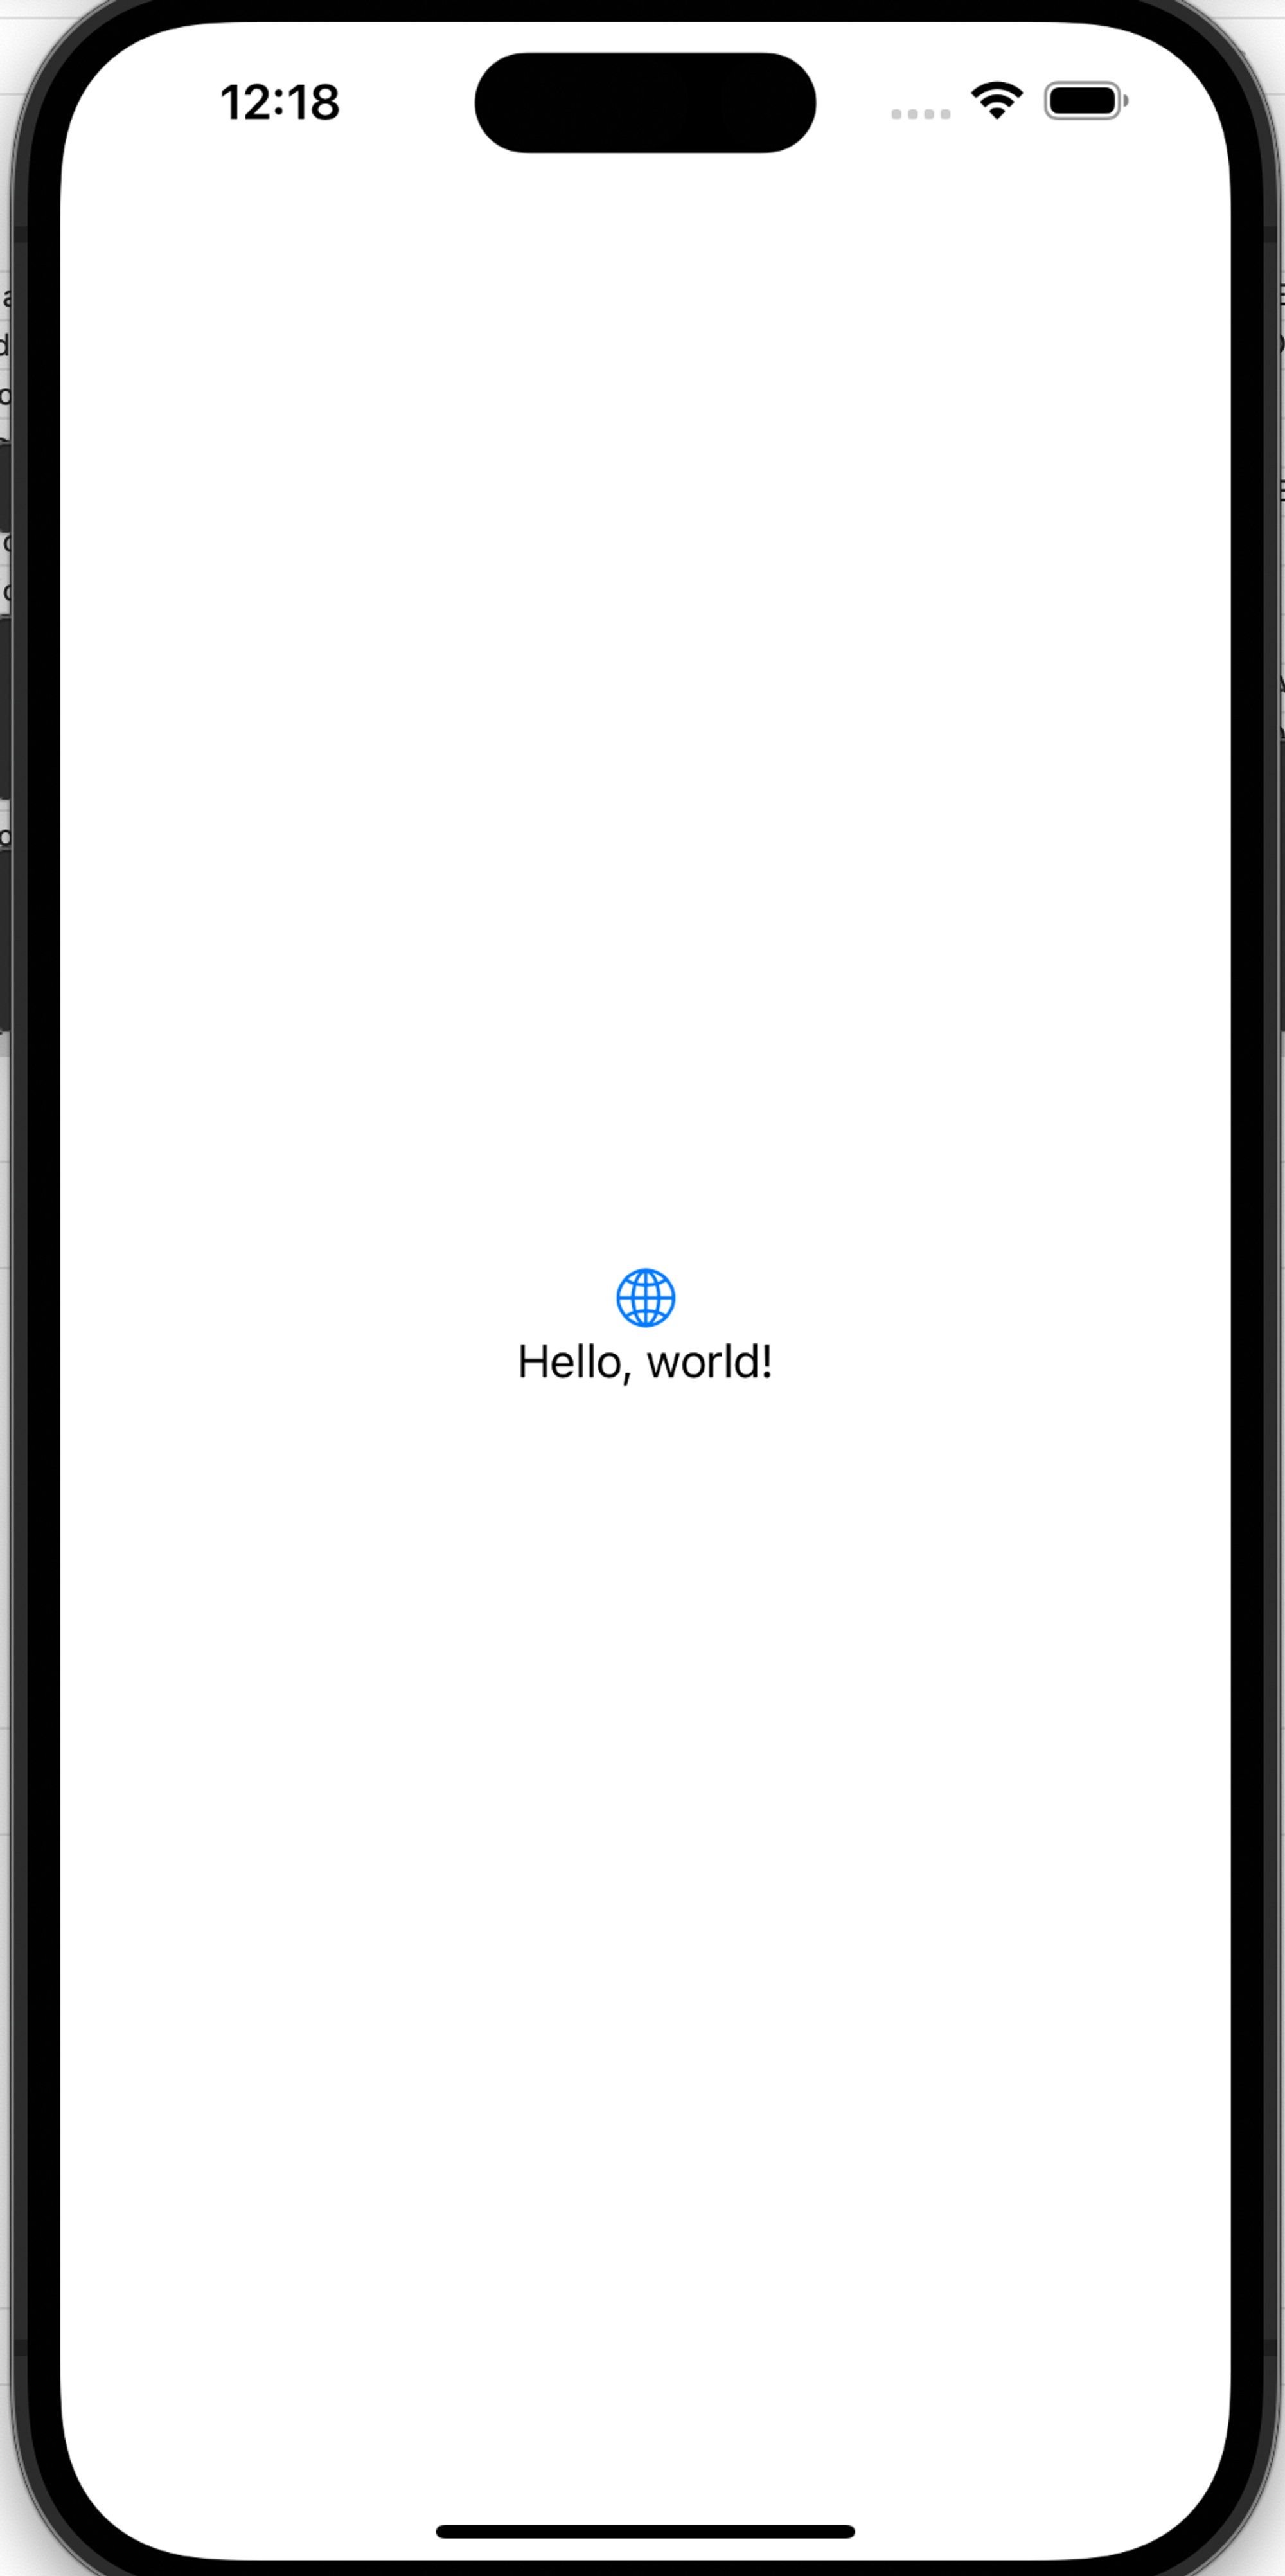
Select Run and make sure the application launches with a “Hello, world!” text in the middle of the display, as shown in the following image:
Step 2: Initialize the SDK
The first capability you will build into your app is to initialize the SDK so that the app can use
its functions and classes. To achieve this, you need to import the MobilecredentialVerifierSDK
framework and then initialize the MobileCredentialVerifier class.
-
Open the
ContentViewfile in your new project and replace any existing code with the following:ContentView import SwiftUI // Step 2.3: Import MobileCredentialVerifierSDK struct ContentView: View { @State var viewModel: VerifierViewModel = VerifierViewModel() var body: some View { NavigationStack(path: $viewModel.navigationPath) { VStack { Button("Request credentials") { viewModel.requestCredentials() } .padding() } .navigationDestination(for: NavigationState.self) { destination in switch destination { case .viewResponse: presentationResponseView } } } // Step 4.2: Handle MATTR VII redirect } // MARK: Verification Views var presentationResponseView: some View { // Step 4.4: Create PresentationResponseView EmptyView() } } // MARK: VerifierViewModel @Observable final class VerifierViewModel { var navigationPath = NavigationPath() // Step 2.4: Setup platform configuration // Step 2.5: Add MobileCredentialVerifier var // Step 2.6: Initialize the SDK // Step 3.1: Create MobileCredentialRequest instance // Step 3.2: Create receivedDocuments variable } // MARK: Same Device Verification extension VerifierViewModel { func requestCredentials() { // Step 3.3: Request credentials } } // MARK: - Navigation enum NavigationState: Hashable { case viewResponse }This will serve as the basic structure for your application. You will copy and paste different code snippets into specific locations to achieve the different functionalities. These locations are indicated by comments that reference both the section and the step.
We recommend copying and pasting the comment text in Xcode search field (e.g.
Step 2.3: Import MobileCredentialVerifierSDK) to easily locate it in the code. -
Create a new file named
Constantsand paste the following code into it to define constants which are required to initialize the SDK:Constants import Foundation enum Constants { static let tenantHost = URL(string: "https://learn.vii.au01.mattr.global")! static let applicationID = "74f91a0f-5909-43b0-a431-6da2397d1f86" }tenantHost: Replace with the URL of your MATTR VII tenant.applicationID: Replace with theidreturned when you created the MATTR VII verifier application.
-
Return to the
ContentViewfile and add the following code after theStep 2.3: Import MobileCredentialVerifierSDKcomment to importMobileCredentialVerifierSDKand gain access to the SDK capabilities:ContentView import MobileCredentialVerifierSDK -
Add the following code under the
Step 2.4: Setup platform configurationcomment to create aPlatformConfigurationinstance:ContentView let platformConfiguration = PlatformConfiguration( tenantHost: Constants.tenantHost, applicationId: Constants.applicationID )This instance configures the MATTR VII tenant that the SDK will interact with (
tenantHost) and the Verifier Application the SDK represents (applicationId), based on the constants defined in theConstantsfile. From v6.0.0, theapplicationIdis supplied here viaPlatformConfiguration(it is no longer passed torequestMobileCredentials), and it also drives the SDK Backend. -
Add the following code after the
Step 2.5: Add MobileCredentialVerifier varcomment to create a variable that will hold themobileCredentialVerifierinstance when the SDK is initialized:ContentView var mobileCredentialVerifier: MobileCredentialVerifier -
Add the following code after the
Step 2.6: Initialize the SDKcomment to initialize theMobileCredentialVerifierinstance with the parameters defined in theplatformConfigurationinstance:ContentView init() { mobileCredentialVerifier = MobileCredentialVerifier.shared Task { do { try await mobileCredentialVerifier.initialize(platformConfiguration: platformConfiguration) } catch MobileCredentialVerifierError.failedToRegister { // Registration with the MATTR VII tenant failed during SDK Backend setup. // Print the reason so the failure is visible: check connectivity and that // tenantHost, applicationId, and the app's bundle identifier / team ID match // the Verifier Application configuration. print("SDK initialization failed to register:", MobileCredentialVerifierError.failedToRegister) } catch MobileCredentialVerifierError.invalidLicense { // The SDK license is missing, invalid, or expired. print("SDK initialization failed: invalid license") } catch { print("SDK initialization failed:", error.localizedDescription) } } }The
initializemethod is asynchronous (called here from aTask) and drives the SDK Backend: on first launch it registers the app instance with your tenant and obtains a license. Network access is required the first time the SDK initializes and when the license is later renewed. -
Run the app to ensure it compiles successfully.
Step 3: Request a credential from wallet application
Once the SDK is initialized, you can start building the capabilities to request an mDoc for verification from a wallet application. This is done by:
- Creating a request object that defines what information is required for verification.
- Sending this request to the wallet application installed on the device.
- Redirecting the user to the wallet application to present the requested mDoc.
-
Open the
ContentViewfile and add the following code under theStep 3.1: Create MobileCredentialRequest instancecomment to create a new MobileCredentialRequest instance:ContentView let mobileCredentialRequest = MobileCredentialRequest( docType: "org.iso.18013.5.1.mDL", namespaces: [ "org.iso.18013.5.1": [ "family_name": false, "given_name": false, "birth_date": false ] ] )This object defines what information is required for verification:
- The requested credential type (e.g.
org.iso.18013.5.1.mDL). - The claims required for verification (e.g.
family_name). - The requested namespace (e.g.
org.iso.18013.5.1). - Whether or not the verifier intends to persist the claim value (
true/false). Declarative only and not currently enforced by the SDK. For the verification to be successful, the presented credential must include the referenced claim against the specific namespace defined in the request. Our example requests thebirth_dateunder theorg.iso.18013.5.1namespace. If a wallet responds to this request with a credential that includes abirth_datebut rather under theorg.iso.18013.5.1.USnamespace, the claim will not be verified.
- The requested credential type (e.g.
-
Add the following code under the
Step 3.2: Create receivedDocuments variablecomment to create a newreceivedDocumentsvariable that will hold the response received from the wallet application:ContentView var receivedDocuments: [MobileCredentialPresentation] = [] -
Add the following code under the
Step 3.3: Request credentialscomment to call the SDK'srequestMobileCredentialsmethod:ContentView Task { @MainActor in // Clean the response before fetching a new one receivedDocuments = [] do { let onlinePresentationResult = try await mobileCredentialVerifier.requestMobileCredentials(request: [mobileCredentialRequest]) // From v6.0.0, OnlinePresentationSessionResult is a @frozen enum with // success and failure cases. switch onlinePresentationResult { case .success(_, _, let mobileCredentialResponse): receivedDocuments = mobileCredentialResponse?.credentials ?? [] case .failure(_, _, let error): print("No response received: \(error.message)") return } } catch { print(error.localizedDescription) } }The following parameter is passed to the
requestMobileCredentialsmethod:request: Defines what information to request. This example is passing themobileCredentialRequestinstance you created in the previous step.
From v6.0.0, the
applicationIdis no longer passed here — it is supplied viaPlatformConfigurationwhen you initialize the SDK. Thechallengeparameter is now optional: when omitted, the SDK generates a cryptographically secure challenge for you. You can still pass your ownchallenge(a unique, unpredictable value per session) to mitigate replay attacks if you prefer to manage it yourself. -
Run the app and press
Request credentialsbutton.You will be redirected to a compliant wallet application, where you will see the verification request details and choose what mDoc to present for verification.
Once you send the response from the wallet nothing will happen, which is expected at this stage. In the next step you will build the capability to redirect the user back to the verifier application and handle the response from the wallet.
Step 4: Display verification results
Once the user provides their consent to share the requested information, the wallet application will send the response back to the MATTR VII tenant, which will then return the verification results to your verifier application and redirect the user back to the configured redirect URI. In this part of the tutorial you will build the capability to handle this redirect and display the verification results in your application.
To enable the redirect back to your verifier application you must register a redirection link. This could be either a Universal link or a custom URL scheme. In this tutorial you will use a custom URL scheme.
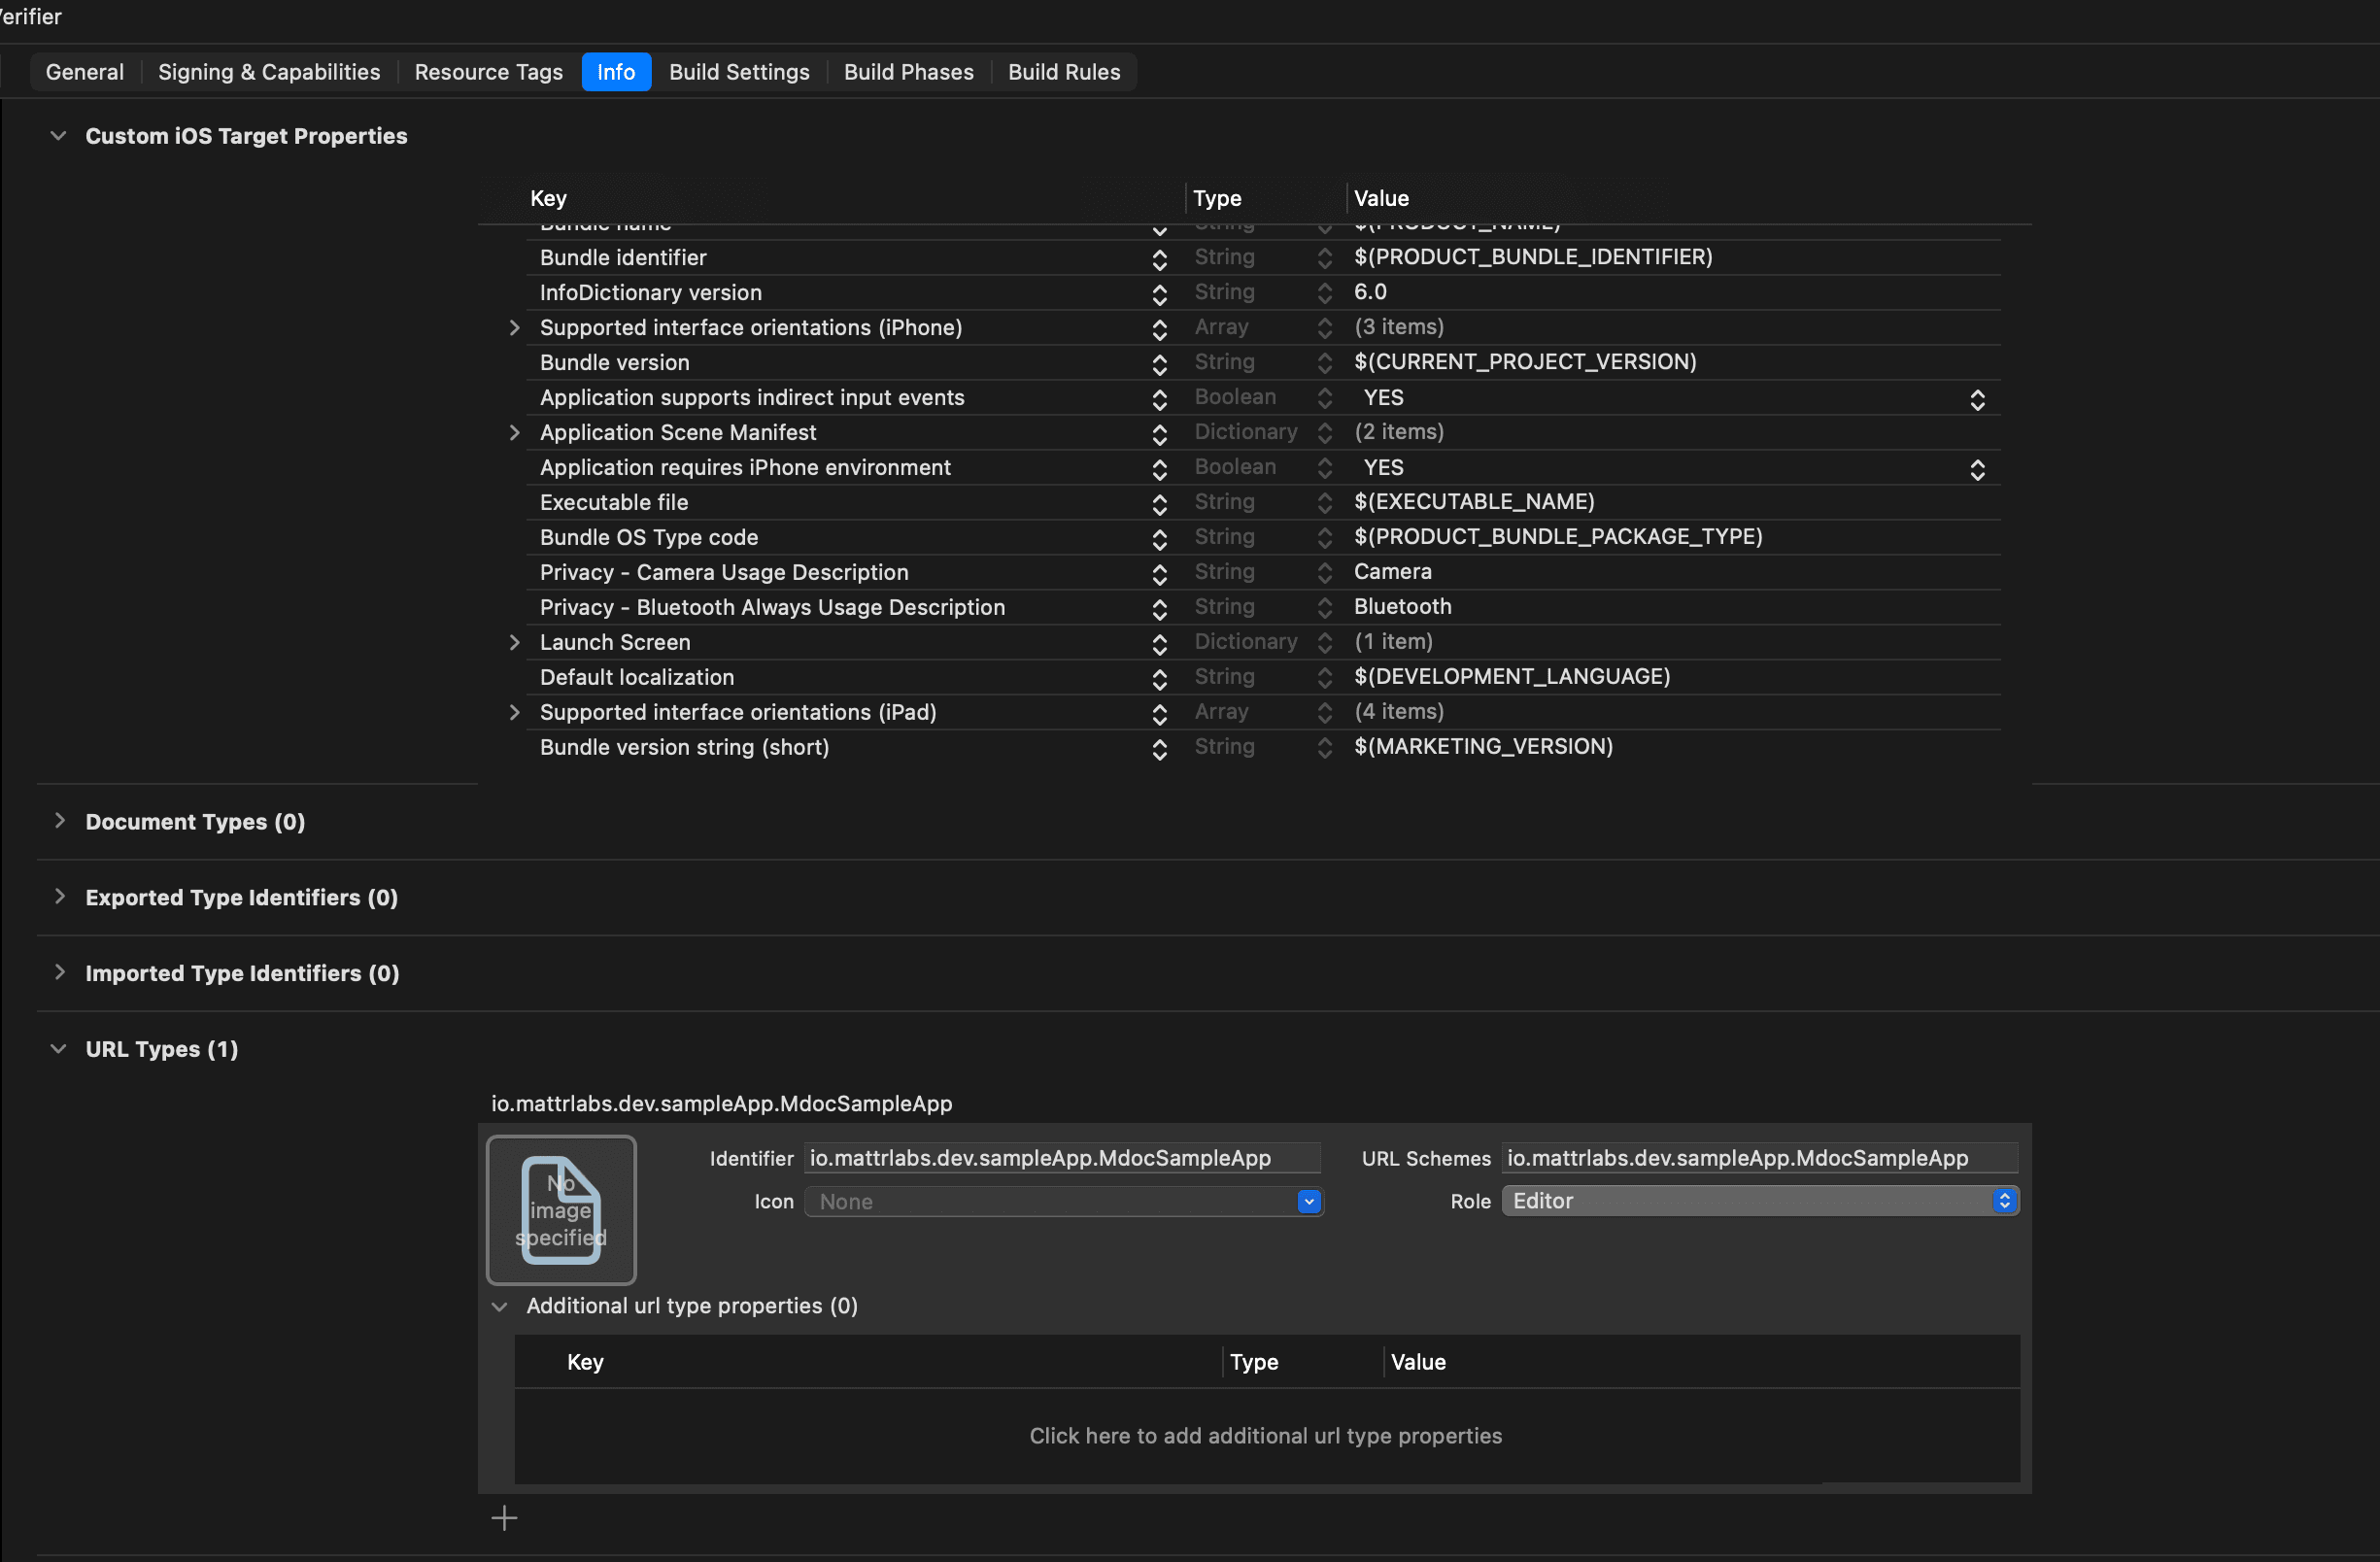
-
Register a custom URL scheme in your verifier application:
- Open the project view and select your application target.
- Select the Info tab.
- Scroll down and expand the URL Types area.
- Select the plus button.
- Insert your app bundle identifier (as set when you configured the MATTR VII verifier application) in both the Identifier and URL Schemes fields.
-
In your
ContentViewfile, add the following code under theStep 4.2: Handle MATTR VII redirectcomment to handle the redirect from the wallet application:ContentView .onOpenURL { url in // Navigate to response screen viewModel.navigationPath.append(NavigationState.viewResponse) viewModel.mobileCredentialVerifier.handleDeepLink(url) }This will pass the redirect URL to the SDK's
handleDeepLinkmethod, which will process the response from the wallet application and update thereceivedDocumentsvariable with the verification results. -
Create a new file named
DocumentViewand add the following code to display the retrieved verification results:DocumentView import MobileCredentialVerifierSDK import SwiftUI struct DocumentView: View { var viewModel: DocumentViewModel var body: some View { VStack(alignment: .leading, spacing: 10) { Text(viewModel.docType) .font(.title) .fontWeight(.bold) .padding(.bottom, 5) Text(viewModel.verificationResult) .font(.title) .fontWeight(.bold) .foregroundStyle(viewModel.verificationFailedReason == nil ? .green : .red) .padding(.bottom, 5) if let verificationFailedReason = viewModel.verificationFailedReason { Text(verificationFailedReason) .font(.title3) .fontWeight(.bold) .foregroundStyle(.red) .padding(.bottom, 5) } ForEach(viewModel.namespacesAndClaims.keys.sorted(), id: \.self) { key in VStack(alignment: .leading, spacing: 5) { Text(key) .font(.headline) .padding(.vertical, 5) .padding(.horizontal, 10) .background(Color.gray.opacity(0.2)) .cornerRadius(5) ForEach(viewModel.namespacesAndClaims[key]!.keys.sorted(), id: \.self) { claim in HStack { Text(claim) .fontWeight(.semibold) Spacer() Text(viewModel.namespacesAndClaims[key]![claim]! ?? "") .fontWeight(.regular) } .padding(.vertical, 5) .padding(.horizontal, 10) .background(Color.white) .cornerRadius(5) .shadow(radius: 1) } } .padding(.vertical, 5) } if !viewModel.claimErrors.isEmpty { Text("Failed Claims:") .font(.headline) .padding(.vertical, 5) ForEach(viewModel.claimErrors.keys.sorted(), id: \.self) { key in VStack(alignment: .leading, spacing: 5) { Text(key) .font(.headline) .padding(.vertical, 5) .padding(.horizontal, 10) .background(Color.gray.opacity(0.2)) .cornerRadius(5) ForEach(viewModel.claimErrors[key]!.keys.sorted(), id: \.self) { claim in HStack { Text(claim) .fontWeight(.semibold) Spacer() Text(viewModel.claimErrors[key]![claim]! ?? "") .fontWeight(.regular) } .padding(.vertical, 5) .padding(.horizontal, 10) .background(Color.white) .cornerRadius(5) .shadow(radius: 1) } } .padding(.vertical, 5) } } } .padding() .background(RoundedRectangle(cornerRadius: 10).fill(Color.white).shadow(radius: 5)) .padding(.horizontal) } } // MARK: DocumentViewModel @Observable class DocumentViewModel { let docType: String let namespacesAndClaims: [String: [String: String?]] let claimErrors: [String: [String: String?]] let verificationResult: String let verificationFailedReason: String? init(from presentation: MobileCredentialPresentation) { self.docType = presentation.docType self.verificationResult = presentation.verificationResult.verified ? "Verified" : "Invalid" self.verificationFailedReason = presentation.verificationResult.failureType?.rawValue self.namespacesAndClaims = presentation.claims?.reduce(into: [String: [String: String]]()) { result, outerElement in let (outerKey, innerDict) = outerElement result[outerKey] = innerDict.mapValues { $0.textRepresentation } } ?? [:] self.claimErrors = presentation.claimErrors?.reduce(into: [String: [String: String]]()) { result, outerElement in let (outerKey, innerDict) = outerElement result[outerKey] = innerDict.mapValues { "\($0)" } } ?? [:] } } // MARK: Helper extension MobileCredentialElementValue { var textRepresentation: String { switch self { case .bool(let bool): return "\(bool)" case .string(let string): return string case .int(let int): return "\(int)" case .unsigned(let uInt): return "\(uInt)" case .float(let float): return "\(float)" case .double(let double): return "\(double)" case let .date(date): let dateFormatter = DateFormatter() dateFormatter.dateStyle = .short dateFormatter.timeStyle = .none return dateFormatter.string(from: date) case let .dateTime(date): let dateFormatter = DateFormatter() dateFormatter.dateStyle = .short dateFormatter.timeStyle = .short return dateFormatter.string(from: date) case .data(let data): return "Data \(data.count) bytes" case .map(let dictionary): let result = dictionary.mapValues { value in value.textRepresentation } return "\(result)" case .array(let array): return array.reduce("") { partialResult, element in partialResult + element.textRepresentation } .appending("") @unknown default: return "Unknown type" } } }The
DocumentViewfile comprises the following elements:DocumentView: Basic UI layout for viewing received documents and verification results.DocumentViewModel: This class takesMobileCredentialPresentationand converts its elements into strings that are displayed in theDocumentView.- Extension of
MobileCredentialElementValuewhich converts the values of received claims into a human-readable format.
-
Return to the
ContentViewfile and replace theEmptyView()under theStep 4.4: Create PresentationResponseViewcomment with the following code to display theDocumentViewview when verification results are available:ContentView ZStack { if viewModel.receivedDocuments.isEmpty { VStack(spacing: 40) { Text("Waiting for response...") .font(.title) ProgressView() .progressViewStyle(.circular) .scaleEffect(2) } } else { ScrollView { ForEach(viewModel.receivedDocuments, id: \.docType) { doc in DocumentView(viewModel: DocumentViewModel(from: doc)) .padding(10) } } } }
Test the end-to-end workflow
- Run the app.
- Select the Request credentials button.
You should be redirected to a compliant wallet application, where you will see the verification request details and choose what mDoc to present for verification. - Use the wallet application to present the requested mDoc.
You will be redirected back to the verifier application where you will see the verification results.
You should see a result similar to the following:
- The verifier app starts a presentation session and gets redirected.
- The user is redirected to a compliant wallet application.
- The user provides their consent to share the requested information.
- The wallet application sends the response back to the MATTR VII tenant.
- The MATTR VII tenant redirects the user back to the verifier app with the verification results.
- The verifier app fetches the result and presents the result to user.
Congratulations! Your verifier application can now verify mDocs presented from a compliant wallet installed on the same mobile device.
Summary
You have just used the mDocs Mobile Verifier SDKs to build an application that can verify an mDoc presented from a compliant wallet on the same device using a remote presentation workflow as per OID4VP and ISO/IEC 18013-7 Annex B.
This was achieved by building the following capabilities into the application:
- Initialize the SDK, so that your application can use its functions and classes.
- Request an mDoc for verification from a compliant wallet application.
- Display verification results in your verifier application.
What's next?
- You can check out the SDKs reference documentation to learn more about available functions and classes:
How would you rate this page?
Last updated on